This website stores data such as cookies to enable important site functionality including analytics, targeting, and personalization to give you the best possible experience while you browse through our website. You can view our Cookies Policy here. By pursuing the use of our website you implicitly agree to the usage of cookies on this site.
020 3432 5550020 3432 5550 [email protected]Happy New Year 2026. Fully Operational, New Ownership.
What are iron on patches and how to use the Iron-on Patches

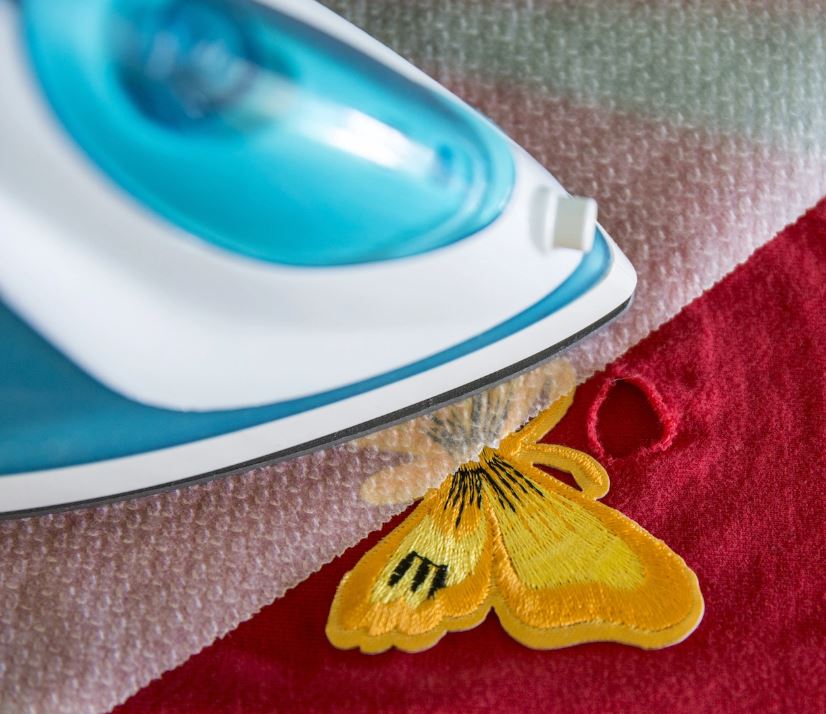
How to iron on a patch? Iron-on patches have a special kind of backing that allows a bond to be formed between the patch and its fabric upon heating.
The heat seal backing adds some stiffness, letting them lie flat.
Do iron on patches work? Luckily for you, custom made embroidered patches can be attached to garments using your simple home iron. They’re ideal for decorating casual clothing and can be easy to apply.
Our custom embroidered and printed patches inspire people to get creative and you can build your patch too. Our customization tool allows you to make low-cost personalized clothing at home, for fashion or costume designing, merchandise production, simple wardrobe wear, or garments that need to be decorated quickly. The cool iron on patches are relatively cheap and easy to source and can serve their purpose excellently.
How do iron on patches work? Iron-on patches can only provide you with temporary security. They don’t last too long, and with every wash, their lifeline reduces even more, for this reason, we recommend giving some stitches in the corner to make them more durable.
How to iron on patch?
Do NOT use on un-ironable fabrics (low melting point) such as nylons, vinyl, or leathers. Iron may scorch leathers and suede material 1. Prewash all materials without fabric softeners. 2. Preheat the iron to maximum heat. Make sure the "steam" option is turned off. On heat press machine 150 C / maximum pressure / 20-25sec on both sides. 3. Place the patch on the garment glue side down (peal the protective paper first if exist). 4. Cover with a thin white cloth or towel, we recommend silicon paper (backing paper). 5. With a home iron, keep the pressure on for 45-50 seconds on a hard surface (floor); Do NOT run the iron, Hold in one spot for some time! For the heat press machine 25 seconds on each side. For large custom embroidered patches please start pressing from the center to the edges of a patch. After this please press once again the edges of a patch about 5 sec. 6. Let cool, then turn the garment inside out and iron on the reverse side for 15 seconds. 7. Laundry Instructions: Turn the shirt inside out. Cold wash, Gentle cycle, Drip dry. Do NOT put the garment in the dryer! Do NOT bleach. First washing of the pressed patch can take place after 48 hrs. Because the glue is a temporary solution we advise to give a few stitches on the patch edge to keep it for a long time. Please pay attention to all plastic elements in a nearby patch hot iron may damage them!!! Patches can be sewn onto fabric or garments with a single or double stitch.


